This section is specific to the Epson brand of printers, and may be outdated. Please refer to the documentation included with the latest version of the Epson utility.
Once the TCP/IP settings have been completed for the printer, the next step is to set the OPOS settings for the printer.
Epson's "Setup POS" application is used to add printers to the computer, so that Win-EZ Printing can communicate with the printer.
After starting the "Setup POS" program, you will be presented with the following screen.
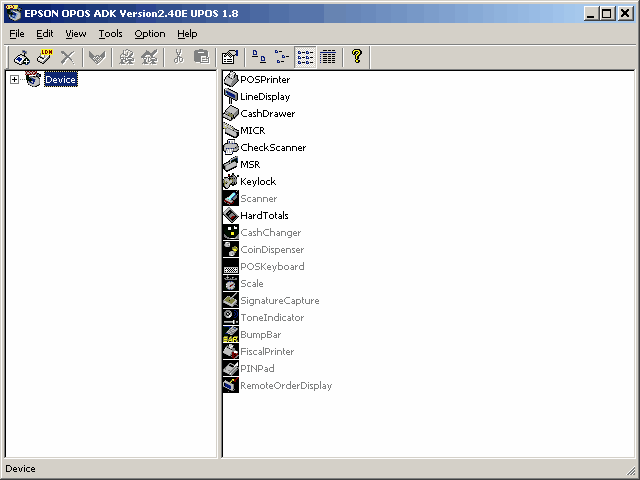
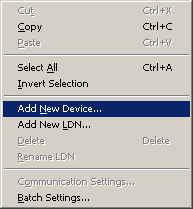
Select Edit, and Add New Device
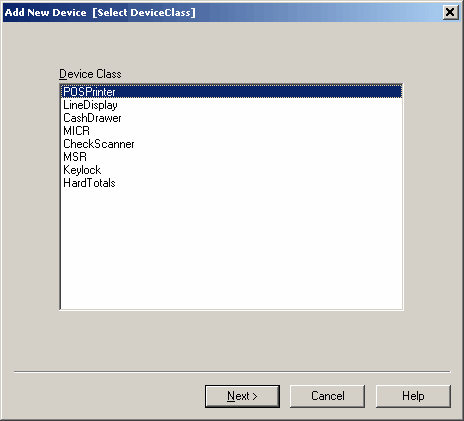
Select POSPrinter, and then Next
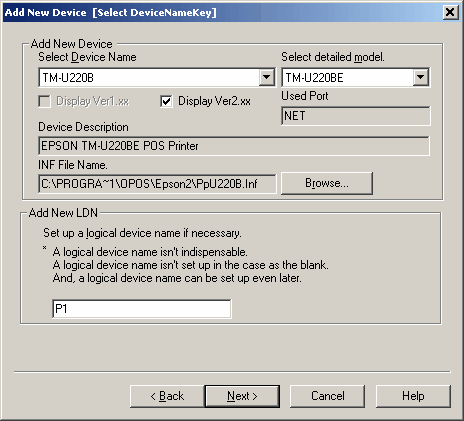
From the "Select Device Name" Drop Down, select the model of the printer. (ie TM-U220B)
From the "Select Detailed Model" Drop Down, select the appropriate interface card. (no extension for a serial card, a P id for Parallel, a U for USB, and an E for Ethernet)
Enter the LDN. Remember that the LDN must be a capitol "P" followed by a number 1 - 10. These numbers will correspond to the print jobs within Win-EZ POS
Select Next
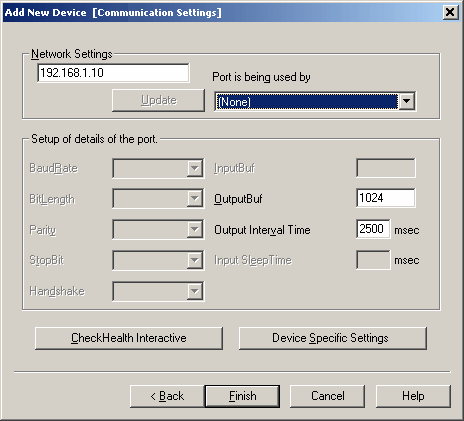
Enter the IP address for the printer that was setup in the TmNet WinConfig utility
You must press the update button or the setting will not be saved.
Select the CheckHealth Interactive button
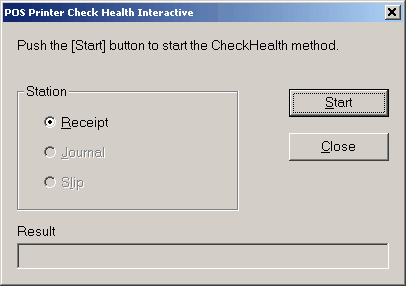
Select start, a test slip should print from the printer.
If an error screen appears instead of the Check health screen (pictured above), check to ensure that the IP address is correct, or that the printer is on, or functional.
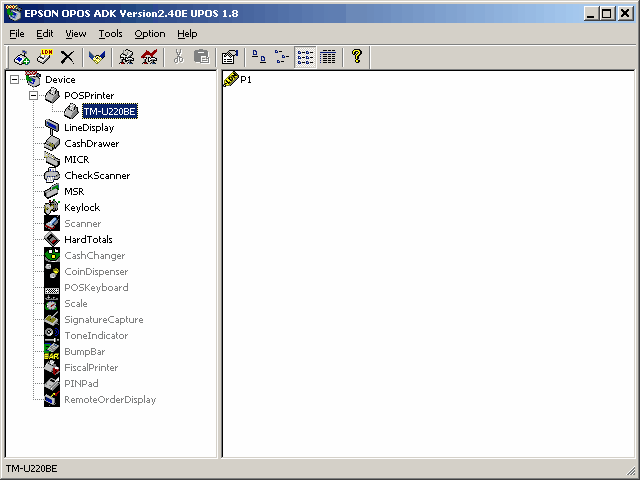
You should now have the printer displayed in the list as above
Repeat for any other printers that need to be installed.