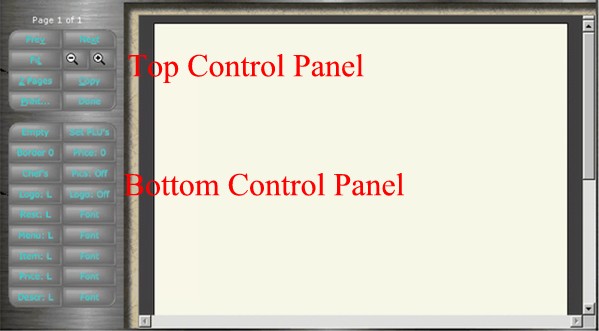
The Top Control Panel
The Prev and Next Buttons: Used for scrolling between multi-page menus.
Fit: This will resize the menu to fit the screen, width wise.
- & + magnifiers: zoom in and out on the current menu.
2 Pages: Used to view 2 pages laying next to one another. When clicked the button will change to "1 Page", click this to return to the original format.
Copy: Use this to make a copy of a special menu (like the right click and copy function) and then go to another program (exp. paint or word) and from there right click and select paste.
Print...: Used to print the current menu.
Done: Used to exit Menu Maker.
The Bottom Control Panel
The Menu Title Button(Empty): This button, when Menu Maker is started it will "empty". By creating a title for the menu, using the menu button, the menu title will appear here. It will store up to 4 menu's. Use this button to move through the created menus.
The Set PLUs Button: Used to add and delete items from the menu. Clicking this button will open a small product screen directly to the right of this button, scroll up and down to pick the items to add to the special menu. Click on the box (a check mark will appear in the box) to add the item, clicking the item will not add it. To take an item off, click the box again to remove the check mark. To close the product screen click on the Set PLUs button again. The menu will use the Description field above the picture (if there is a picture) or the large white box (if there is no picture) as the name of the item. If the Description field is blank, then the menu will show the first item description. (The Description is 200 characters long as opposed to the 17 characters of the product item description)
The Border Button: Used to choose what border to have around the menu. Each time "border" button is clicked it will cycle to the next border. To have no border, set the button to Border: 0.There are 14 public domain borders included with this release, but the system will support 99. These borders are in C:\program files\Win-EZ Manager\Borders. Borders can be in .bmp or .jpg format, and must be named "borderxx.bmp / .jpg" where xx = 1 – 99. if a .bmp is found with the filename, the system will not look for a .jpg with the same filename.
The Price button: Used to set what prices will show up. To change the setting, click on the Price button It will reflect what prices that have been entered into each individual item. So if happy hour is set up with the regular prices set under price: 0 and the happy hour prices under price: 1, design a happy hour menu by selecting price: 1.
The Description Button: Used to choose between showing the Chefs description or the Nutritional description. To change the setting, click the button. These descriptions are taken from each individual Product Items.
The Pics Button: Used to turn the pictures on or off. A picture must be imported to the Product Item for it to show up. If there is no picture assigned and pictures is turned, on it will still indent the menu items as if a picture were there. This will require that the dealer add a sub folder to the application folder (C:\Win-EZ\Client\Plupic) called "plupic". Pictures should be in a .bmp or .jpg format, and be named with the PLU Number (i.e. 1.jpg , 1234.bmp). Pictures size should be approximately 3.7 in wide x 2 in high (269x142 pixels) Win-EZ manager will resize the view area to match a smaller picture and move the recipe entry box to fill the space.
The Logo Buttons: The Left Logo Button is used to change the justification of the logo. L = Left,R = Right or C = Center. The Right Logo Button is used to cycle through four logo's or turn the logo off. Logos are in .bmp format, and should be placed into the "borders" folder with a name of "logox.bmp" where x = 1 - 4.
The Rest Button: Used to enter the name of the restaurant under edit and set the justification of the name on the menu. L = Left,R = Right or C = Center. The name of the restaurant does not have to be entered.
The Menu Button: Used to name the menu with edit and set the justification on the menu. L = Left,R = Right or C = Center. The menu name will not show up into the menu title button until the system cycles through the 4 menu titles or Menu Maker is exited and come back in. .
The Item Button: Used to determine the justification of the menu items on the menu. L = Left,R = Right or C = Center
The Price Button: Used to set the justification of the prices on the menu. L = Left,R = Right or C = Center
The Desc. Button: Used to set the justification of the item description. L = Left,R = Right or C = Center
Font: Used to change the corresponding buttons font, font style, & the size as well as the color.
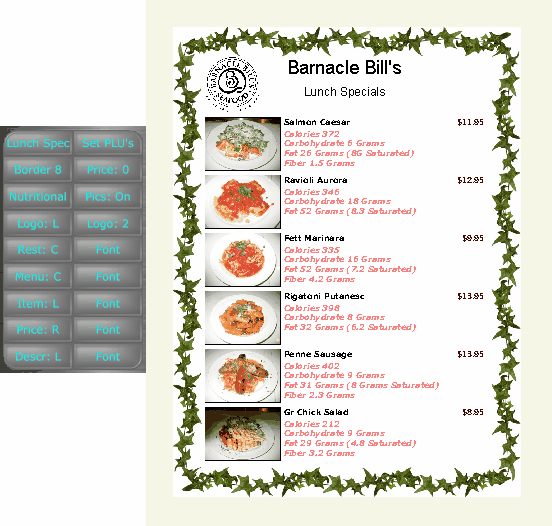
Here is an example of a menu and it's settings.
